Bathroom Waterproofing Membrane Guide for UK Homes
Bathroom waterproofing membrane explained for UK homeowners. Compare types, learn where membranes matter most, and plan a leak-proof installation.
You notice it at the worst time. The bath panel is off, the grout still looks tidy, and yet the plaster below the tub feels damp after every wash. In a Folkestone bathroom, that usually means water has found a path you can't see, not that the tilework has somehow failed to look wet enough.
A bathroom waterproofing membrane exists for that hidden path. It sits behind the finished tile surface and protects the structure when grout joints, seals, corners, and pipe openings let water creep into the build-up.
Why Bathrooms Leak Even When the Tiles Look Fine
A bathroom can look finished and still be letting water into the fabric of the room. The first place it usually goes is not through the centre of a tile, but through the weak edges, the grout lines, the silicone line at a bath, the joint where a tray meets a wall, or the tiny gap around a pipe.
One homeowner in Folkestone might only notice the problem after a slow stain appears on the ceiling below or the bath panel starts to smell musty. By then, the water has already moved behind the surface, which is why a neat tiled finish can be misleading. If you've ever traced a leak back to a hidden route behind a bath panel, the logic is the same as in this leaking shower tray guide, water rarely arrives where you first notice it.
Tiles are not the waterproof layer
Ceramic tiles and grout are durable, but they are not a guarantee of waterproofing. Once water gets into a joint, a crack, or an unsealed edge, it can reach plasterboard, timber-based boards, screed, or masonry beneath the finish.
That's the part many homeowners miss. The bathroom may still look clean and sound underfoot while moisture is working its way into the structure behind it. A leak doesn't need a dramatic opening, just a repeated one.
Practical rule: if water can sit there, splash there, or run there regularly, the structure behind the tile needs protection, not just the visible surface.
A concealed waterproof layer solves the hidden problem. It doesn't make the room look different, but it changes what happens when everyday water exposure finds a joint, edge, or opening.
What a Bathroom Waterproofing Membrane Actually Does
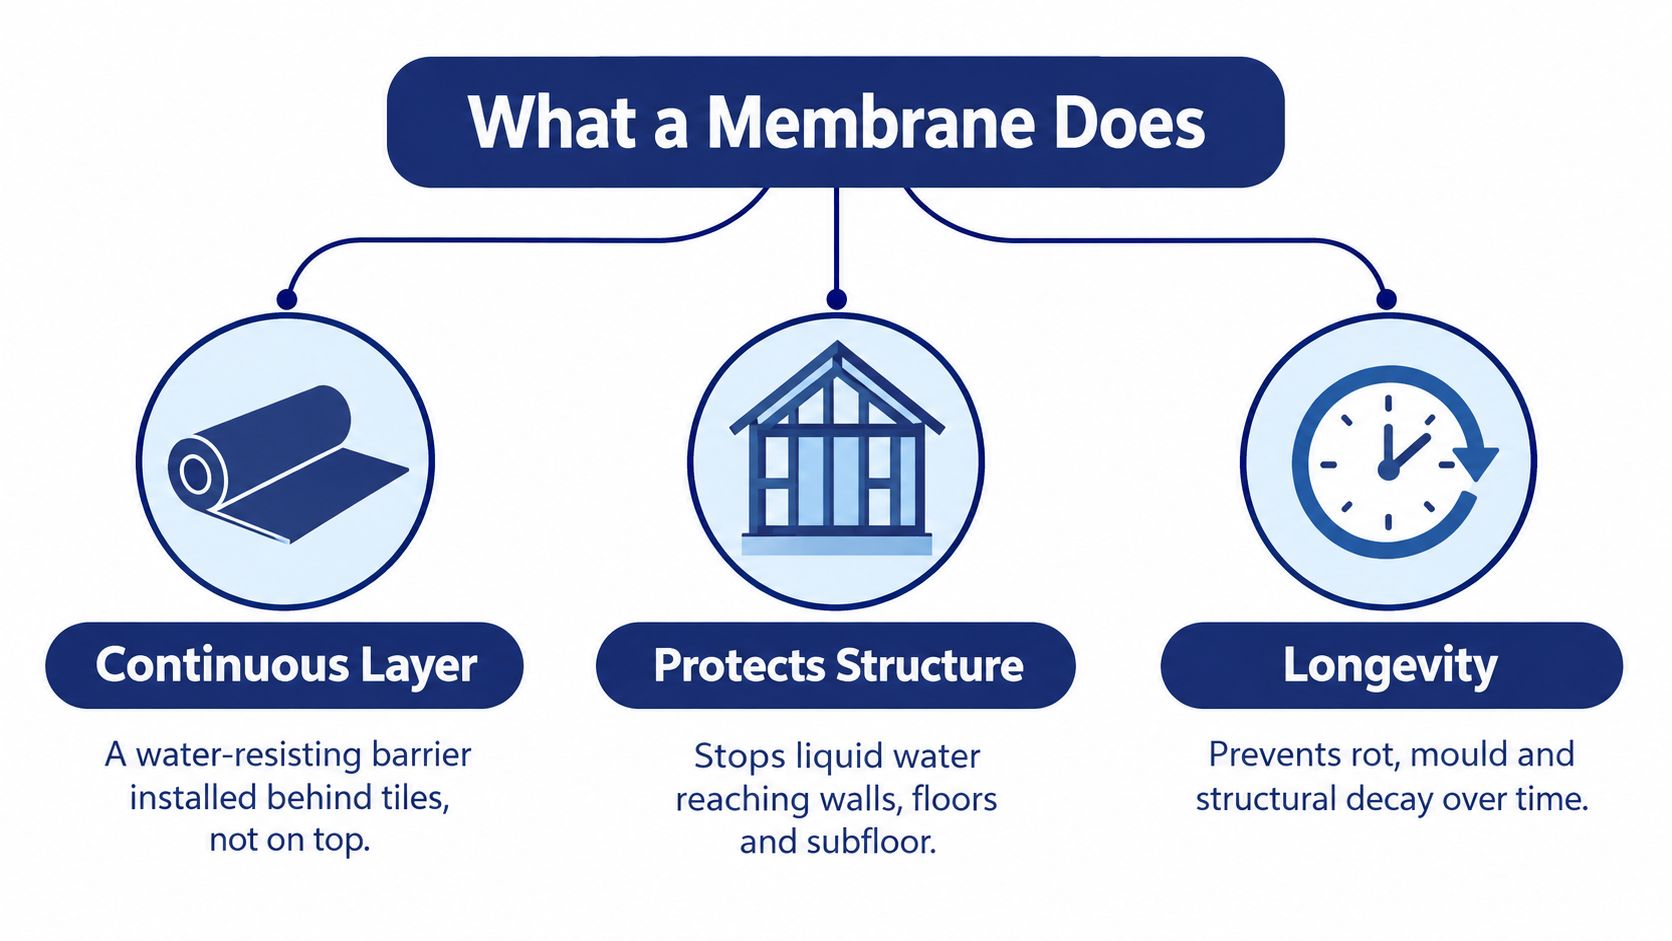
A bathroom waterproofing membrane is a continuous water-resisting layer installed behind the tile finish. Think of it as a raincoat for the substrate, it isn't there for appearance, it's there so the wall or floor underneath doesn't absorb what the tiled surface can't fully stop.
That matters because the tile assembly is only part of the system. The substrate, primer, membrane, reinforcement, adhesive, grout, sealant, and curing time all have to work together if the finished area is going to stay dry in use.
The BS 5385-1 lens
In the UK, BS 5385-1:2018 marked a major shift in how domestic wet areas are treated. It brought domestic showers and bath surrounds into the same kind of risk-management thinking that had previously been associated more clearly with heavier-use wet areas, and it identified wet areas as places where substrates should be waterproofed before tiling. The practical message is simple, waterproofing belongs in the build-up, not as a repair after water has already caused damage. The updated guidance around BS 5385-1 reflects that shift.
Why it has to be a system
A membrane isn't just a coating brushed over a wall and forgotten about. The highest-risk parts are the junctions and transitions, so the system has to include reinforcement at movement-prone spots, proper primer where required, and enough curing time before tiling begins.
A membrane that skips the corners is not a waterproofing system, it's a partial treatment.
That's why the useful question isn't “Do I need waterproofing?” in the abstract. It's “What substrate am I covering, where is the water exposure, and how is every edge being detailed?” Once you answer those, the membrane choice becomes straightforward.
Comparing Liquid-Applied, Sheet and Pre-Formed Systems
Homeowners in Folkestone are usually quoted one of three membrane families. Each can work well, but each suits a different kind of room, timetable, and level of installer skill.
Liquid-applied products are often chosen where the contractor wants a continuous coating over a prepared substrate. Sheet membranes suit installers who want a factory-made barrier with defined joints and overlaps. Pre-formed shower bases and upstands are used where the tray or floor system itself is doing part of the waterproofing work.
The right choice depends less on fashion and more on geometry. A simple bath surround and a boxed-in wall don't ask the same thing from a membrane as a full wet room does. For shoppers comparing details, the tape and corner treatment often matters as much as the membrane face itself, which is why a page like this bathroom waterproofing tape guide is worth reading alongside any product quote.
| Bathroom Waterproofing Membrane Families Compared | ||||
|---|---|---|---|---|
| Membrane type | Typical build-up | Cure or install time | Best-fit bathroom locations | Skill level required |
| Liquid-applied coating | Rolled or trowelled coating built up in coats | Needs drying between coats and before tiling | Shower enclosures, bath surrounds, patch repairs, awkward shapes | Moderate to high, because thickness and coverage must be controlled |
| Sheet membrane | Factory-made sheet fixed to the substrate with adhesive or mortar | Install time is fast once the substrate is prepared | Straight walls, floors, niches, shower zones with clean geometry | High, because joints, overlaps, and corners must be detailed carefully |
| Pre-formed base or tray system | Factory-formed tray or base with integrated waterproof features | Usually quick to fit, but must be set accurately | Shower floors, level tray installations, wet-room builds | High, because levels, falls, and junctions must line up perfectly |
What each family is really good at
Liquid systems are flexible on site, which helps around odd angles, pipework, and remodels where walls aren't perfectly regular. Sheet systems are tidy and predictable when the substrate is sound and the installer is used to handling corners and seams. Pre-formed units save time in the right situation, but they still need careful integration with the walls and drain detail.
The short version is this, the best product is the one that suits the room you have, not the one that sounds strongest in a brochure.
How to read a quote
If the quote says "tanking," ask what that means in practice. You want the membrane type, the primer, the reinforcement method, the curing window, and the exact zones covered. Without that detail, two quotes can look similar while hiding very different levels of work.
Where Membranes Earn Their Cost and Where They Do Not
Not every square metre of a bathroom carries the same risk. A shower enclosure takes daily direct wetting, a bath-shower zone gets splash and overflow exposure, and a dry wall near a loo or vanity usually sees far less water.
That's why the best specification is zone-based rather than dogmatic. A full wet room deserves a different approach from a standard bathroom with one shower wall and a bath. The wrong online advice tends to collapse those situations into one of two extremes, either “tank everything” or “you never need a membrane”. Neither is useful on site.
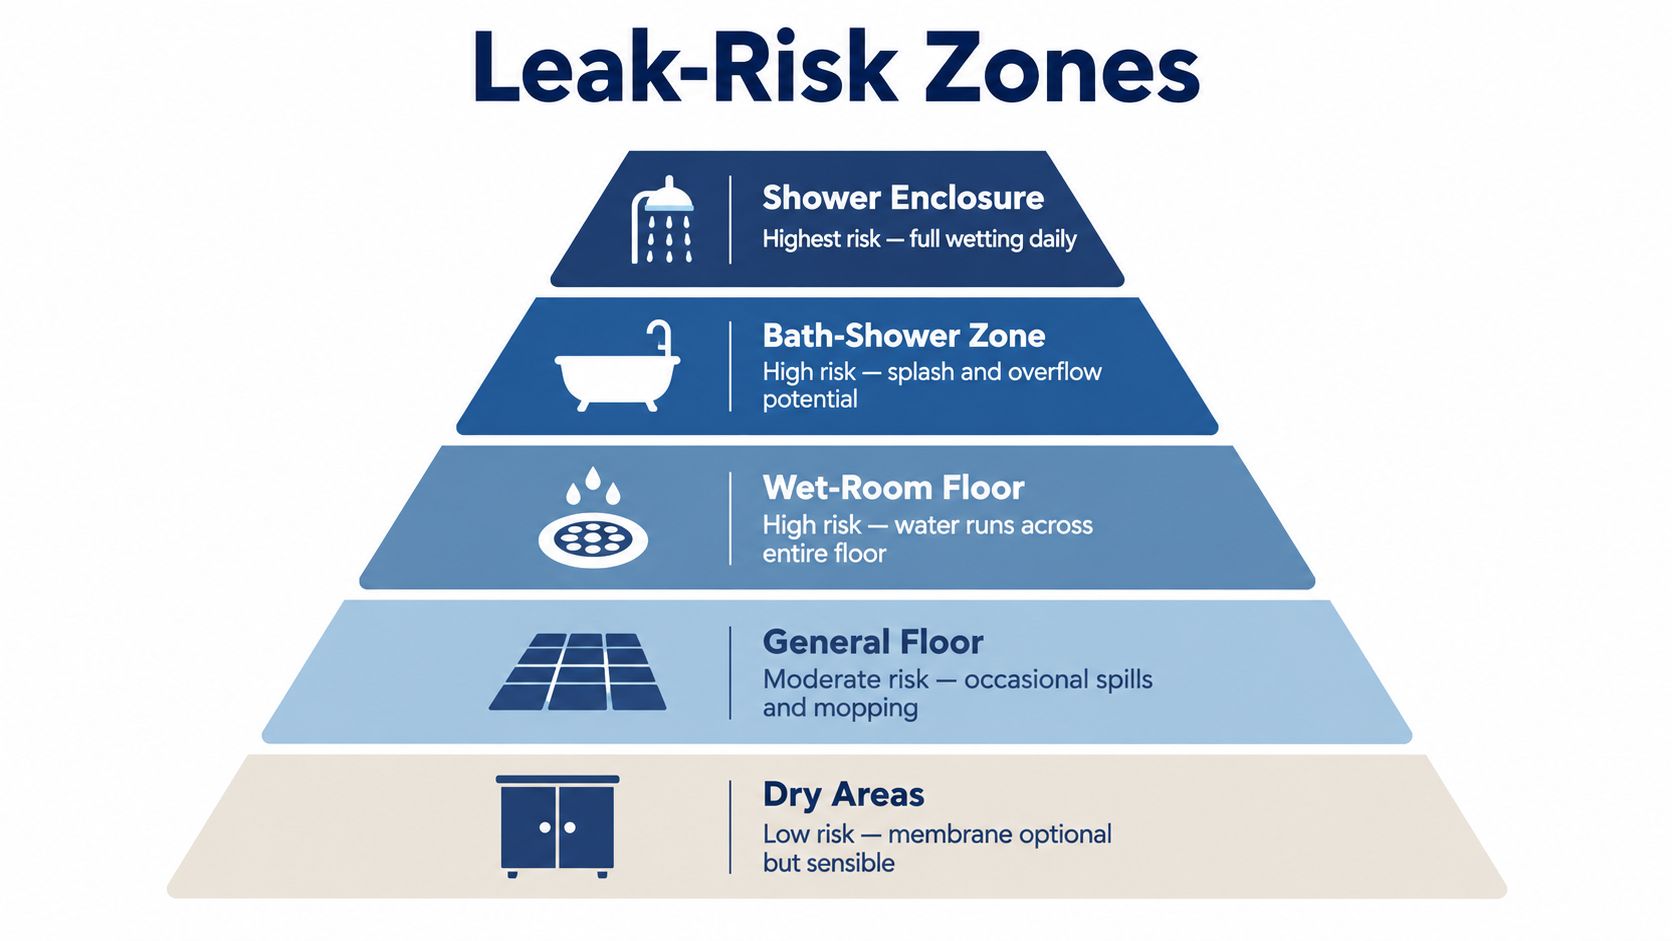
A simple leak-risk hierarchy
- Shower enclosure: this is the highest-risk zone, because it sees full wetting every day.
- Bath-shower zone: this is also high-risk, especially where water can splash beyond the tub edge or get past a screen.
- Wet-room floor: water moves across the whole surface here, so continuity matters more than in a standard room.
- General floor: this is a moderate-risk area where spills and mopping happen, but not constant direct wetting.
- Dry areas: membrane use can still make sense, but the need is usually lower unless the substrate is sensitive.
The logic is simple. The more water a zone sees, the stronger and more continuous the waterproofing detail needs to be.
Where targeted waterproofing makes sense
For many standard bathrooms, shower-area tanking is enough if the rest of the room is dry and the substrate is suitable. For a true wet room, full waterproofing is the sensible route because the whole floor becomes part of the water management system.
For landlords and estate agents, this distinction matters because it avoids over-specifying work where it isn't needed, while still protecting the areas where failure would cause damage. For homeowners, it prevents two common mistakes, under-protecting a shower zone and paying for full wet-room treatment where a focused specification would have done the job.
The Details That Decide Whether a Membrane Fails
Most membrane failures don't happen in the middle of a flat wall. They happen where materials meet, move, or are cut to make way for something else.
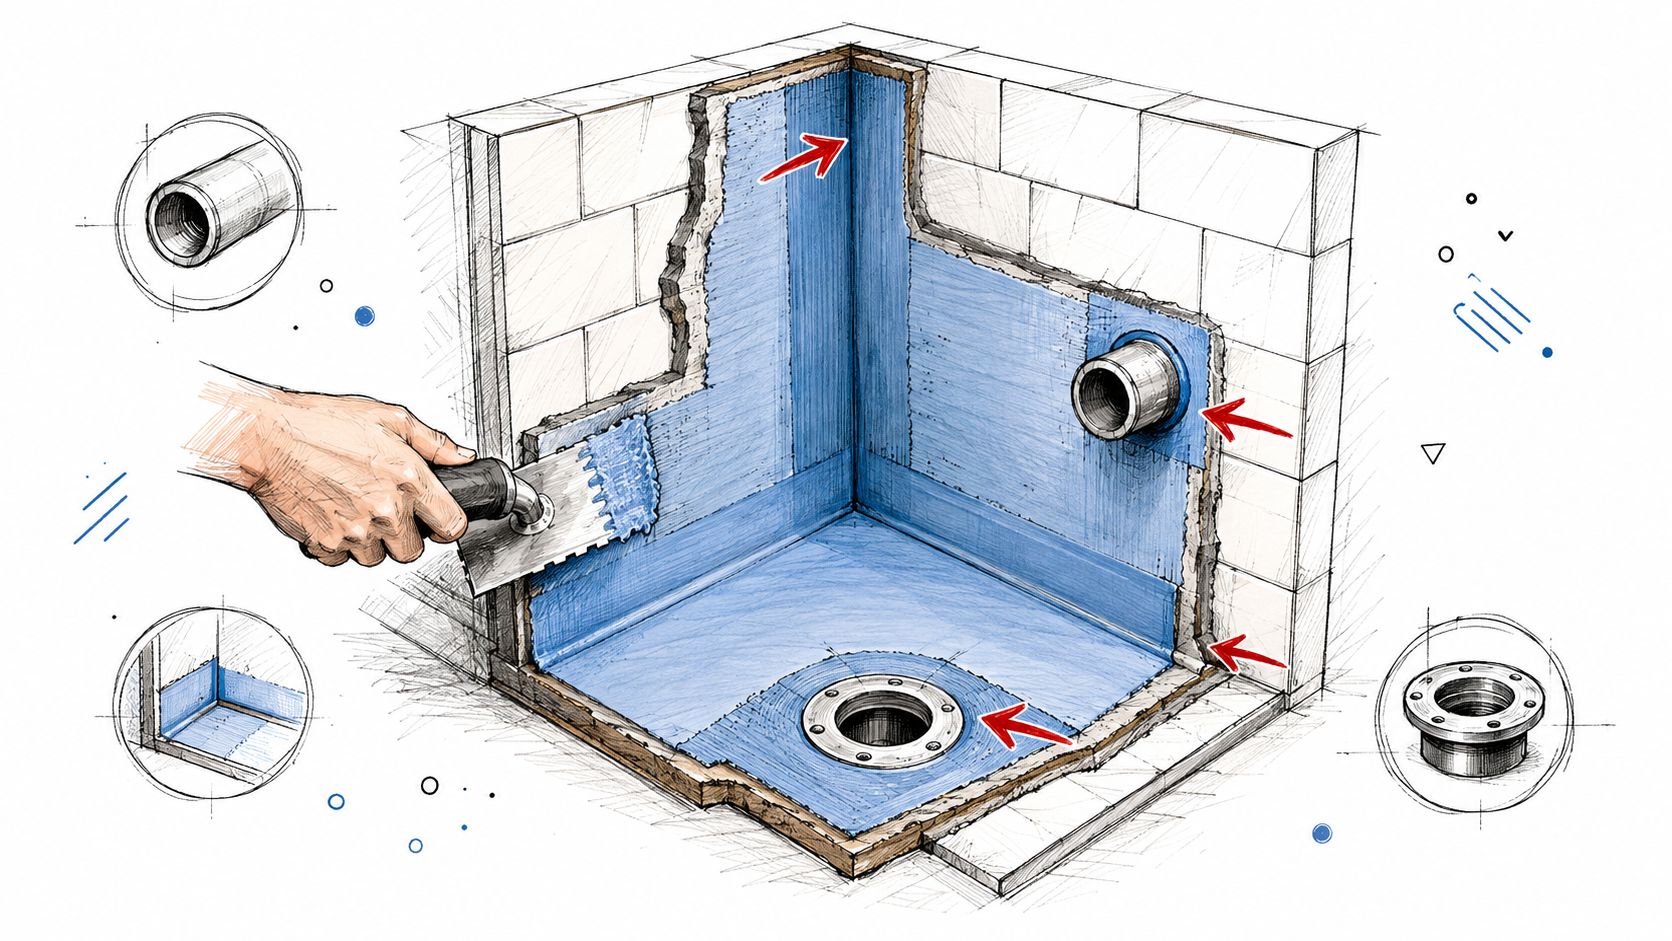
That means internal corners, wall-to-floor junctions, shower tray edges, pipe penetrations, drain interfaces, and movement joints deserve more attention than the broad painted or sheeted field around them. A membrane that looks fine in the centre can still fail if the installer has left one junction under-reinforced.
Where installers need to slow down
Corners need reinforcement because they concentrate stress. Pipe entries need careful sealing because every cut through the substrate is a possible water path. Drain interfaces and tray edges are critical because they combine water exposure with movement.
The same is true where a wall meets a floor. That joint moves, even when the tiles look static, and movement is what opens hairline pathways that water can exploit. If the installer treats those details as an afterthought, the membrane stops behaving like a system.
Contractor question worth asking: how are the corners, penetrations, and tray edges being reinforced, not just coated?
What a good detailing list should cover
A homeowner doesn't need to specify the chemistry, but they do need to ask about the build-up. The useful questions are practical: what tape is used at changes of plane, how are pipes sealed, how is the drain connected, and what curing period is required before tiling starts?
The answer should be specific enough that someone else could inspect the work later and understand what was installed. If the detail relies on “we always do it this way,” ask for the product system and the sequence in writing.
One more practical warning, slow leaks often start where no one wants to strip the room back to inspect. A neat tile finish can hide a poor junction for a long time, which is why the detailing stage is where most of the risk is really controlled.
What to inspect before tiles go on
- Internal corners: check for reinforcing tape or pre-formed corner pieces.
- Wall-to-floor joins: confirm the membrane bridges the change in plane continuously.
- Pipe penetrations: make sure each opening has been sealed as part of the system.
- Tray and drain details: ask how the membrane links into the outlet area.
- Movement joints: confirm the installer has allowed for movement, not just covered over it.
A membrane only earns its keep when the weak points are treated as the main points.
Why Waterproofing Alone Will Not Solve a Damp Bathroom
A bathroom has two different moisture problems, liquid water and vapour. The membrane handles the first one by stopping water entering the structure, but it can't fix condensation, a failed extractor, or bad plumbing.
That's why damp still shows up in UK homes even where waterproofing is installed correctly. The 2024–25 English Housing Survey found damp problems in about 5% of homes, roughly 1.4 million dwellings, and the highest prevalence was 10% in privately rented housing (supporting landlord guidance). The point isn't that every damp bathroom has a failed membrane, it's that moisture problems have more than one route.
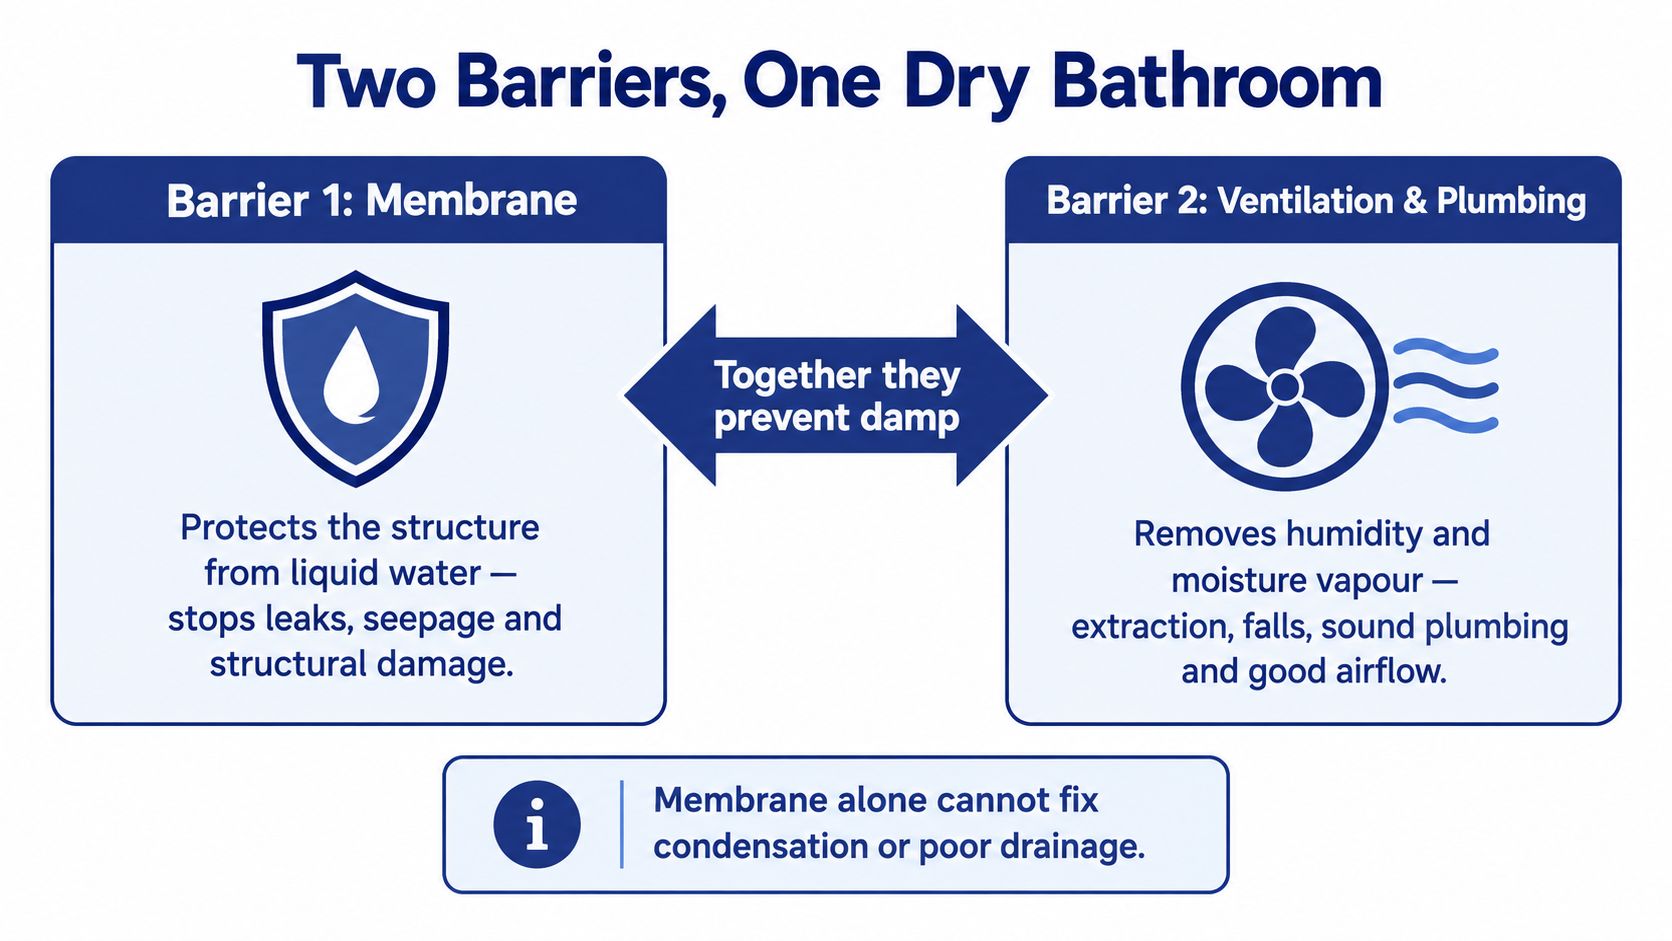
The two-barrier model
Barrier one is the membrane, which protects the structure from liquid water. Barrier two is ventilation and plumbing, which deal with humidity, surface moisture, drainage, and leaks from pipes or fittings.
If the extractor is weak, condensation can still form on cold surfaces. If a bath overflow or waste connection is leaking, no membrane can stop the water already inside the system from causing trouble. The repair depends on the cause, not just the symptom.
Membrane failure, condensation, and plumbing leaks can all look like “damp” from the outside, but they need different fixes.
Landlords, carers, and homeowners get better outcomes when they separate those causes early. A re-tile won't cure poor ventilation, and a new fan won't solve a failed shower tray edge.
Specifying the Wet Area Before the First Tile Goes Up
Waterproofing works best when it's written into the specification before the room is stripped out. Once the first tile is off, the room's substrate, dimensions, and junctions need to be assessed properly, because the membrane choice should follow the actual build, not a guess.
A good wet-area specification records the substrate type, the primer, the membrane system, the reinforcement detail at corners and penetrations, the coverage limits, and the curing window before tiling. That level of detail matters in a Folkestone refit because the room may have a mix of plasterboard, timber backgrounds, masonry, or a tray that needs careful coordination with the tiling set-out.
If the shower opening is tight or the enclosure layout is being changed, even the screen size affects how the wet zone behaves. The point isn't to overcomplicate the job, it's to stop waterproofing from being improvised when other measurements are already locked in. A good set-out is as important as the membrane itself, which is why shower dimension planning belongs in the same early conversation as waterproofing and tiling. Shower door dimensions affect splash containment, access, and how much of the room should be treated as a wet zone.
Questions worth asking during a survey
- What is the substrate? Plasterboard, backer board, masonry, timber backgrounds, and tray systems don't get treated the same way.
- Which membrane system is being used? Liquid, sheet, or pre-formed details should be named clearly.
- How are junctions reinforced? Corners, joints, and penetrations should be treated, not assumed.
- What areas are covered? Ask for the boundary of the wet zone, not just “the shower”.
- When can tiling begin? Curing time affects the programme and shouldn't be guessed on site.
Why documentation saves trouble later
If the work is ever queried, photographs before tiling and a written product record make it much easier to understand what's behind the finish. That helps when the room is sold, let, repaired, or adapted later on.
A membrane hidden behind tile can't be inspected by eye once the room is finished, so the paperwork becomes part of the build quality.
A Practical Handover and Maintenance Checklist
The day the tiling finishes isn't the day the job is over. It's the day the system starts doing its real work, so the handover needs to confirm that the waterproofing, ventilation, and seals are all behaving properly.
Start with the records. Ask for photographs taken before tiling, the membrane product details, and a note of any reinforcement at corners, drains, or pipe entries. If the extractor was upgraded, check that it runs and clears steam instead of just making noise.
Handover check: if you can't tell what membrane system is behind the tile, the job wasn't documented well enough.
What to inspect regularly
- Sealant lines: look at the bath edge, shower tray edge, and screen junctions for gaps or cracking.
- Extractor operation: make sure it works when moisture is high, not just when the switch is flicked.
- Visible tile joints: watch for movement, staining, or repeated darkening.
- Tray and waste area: check for signs of slow leakage after use.
- Room airflow: keep an eye on condensation that lingers longer than it should.
A quick check after heavy use tells you a lot. If the bathroom dries slowly, smells musty, or shows repeated damp marks in the same spot, the cause may be ventilation, a seal, or plumbing rather than the membrane itself.
The best maintenance habit is simple, notice small changes early. That saves the room from becoming a stripping job later.
Seby Bathroom Renovation can help with bathroom refits, targeted leak repairs, and wet-area detailing for homes in Folkestone and Kent. If you want a bathroom waterproofing membrane specified properly from the start, visit Seby Bathroom Renovation to discuss your room, your substrate, and the right level of protection for your refit.