Bathroom Waterproofing Tape: A Complete Installation Guide
Learn where bathroom waterproofing tape works best and where it fails. Get expert tips for a leak-free bathroom in 2026.
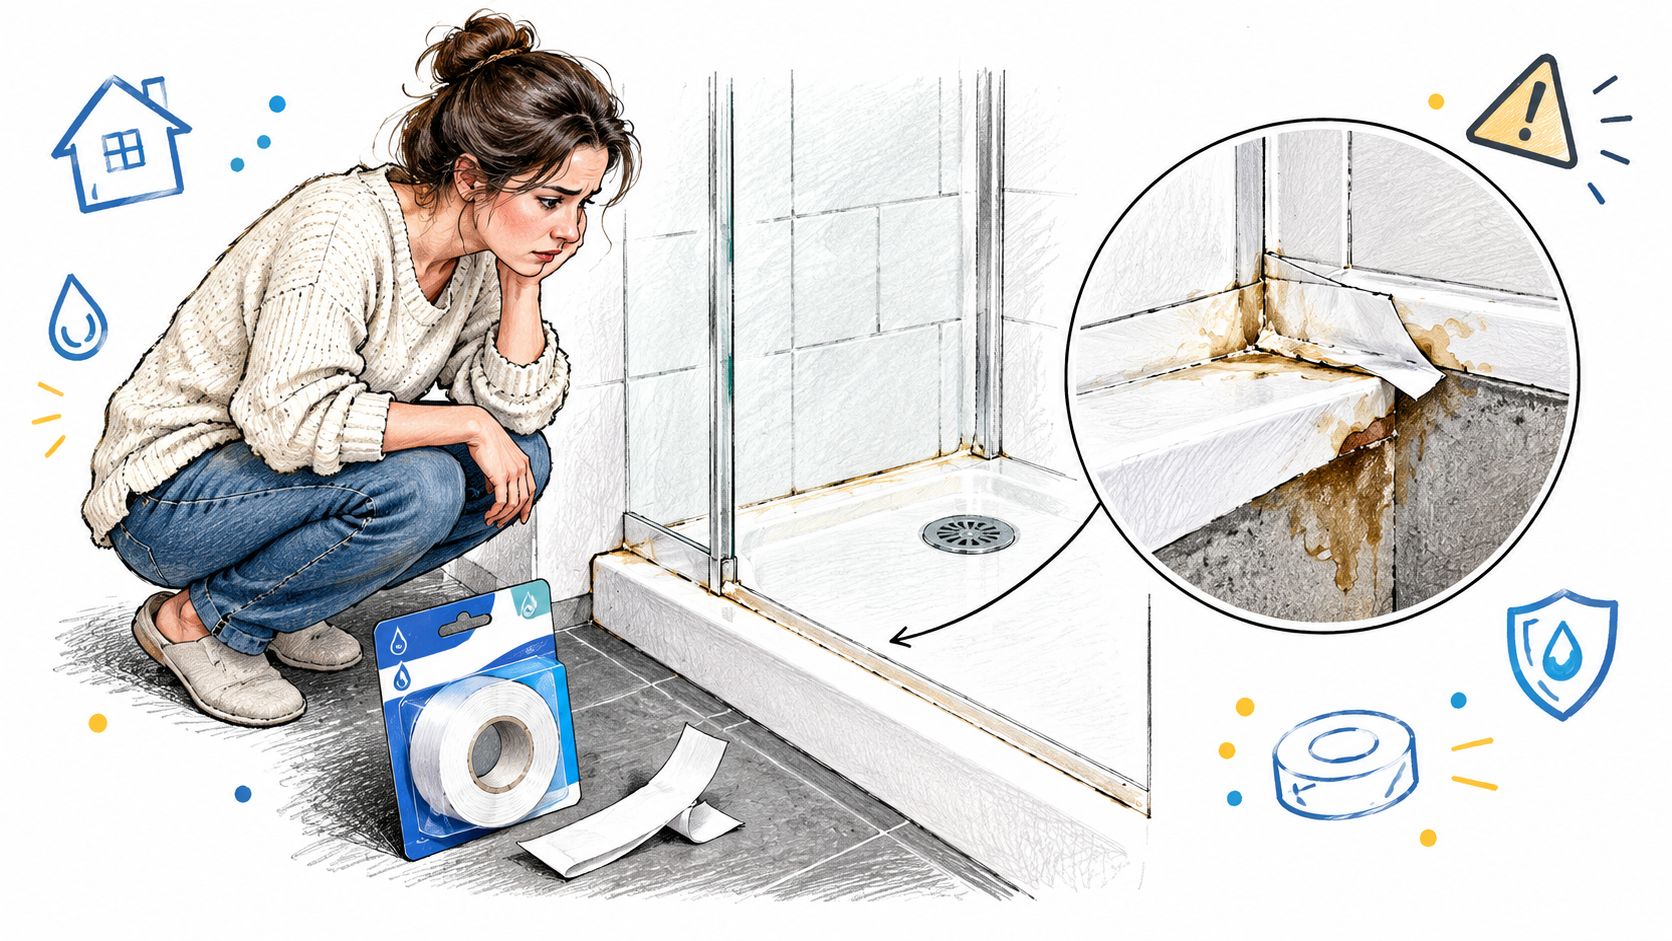
You notice a faint brown mark below the shower, or perhaps the silicone at the bath edge has started to lift. The tiles still look fine, so a roll of bathroom waterproofing tape seems like a sensible, inexpensive answer. In a Folkestone home, that quick patch might hold for a while, then the stain returns because the water isn't entering through the visible joint alone.
Waterproofing tape has an important job, but it isn't a magic strip that turns a defective shower into a watertight one. It works inside a coordinated wet-area system, alongside a sound substrate, primer, membrane, seals, drainage, tile adhesive and ventilation. Get that relationship right and the tape reinforces vulnerable junctions. Ignore the rest and even a well-bonded strip can be asked to solve a problem it was never designed to fix.
Why Most Tape Repairs Fail Before the Tape Is Even Touched
A homeowner in Folkestone sees discolouration on the ceiling below a shower. The first inspection finds cracked grout and a tired silicone bead where the tray meets the wall. After cleaning the joint, they apply a repair tape over the area and reseal the edge. The surface looks neat, but the damp mark eventually returns.
The tape may not have failed. It may have covered a symptom while the true defect remained behind the tiles. Water could be travelling through a failed tray connection, a moving wall-to-floor junction, a saturated backing board or a drain detail that never received proper waterproofing.
The distinction matters because waterproofing tape is a real construction component with a limited purpose. It reinforces joints, corners, changes of plane and penetrations within a compatible tanking system. It isn't a substitute for the membrane covering the wet area, and it won't correct poor falls, failed drainage or a damaged substrate.
The revision of BS 5385-1 and its wet-area waterproofing approach is a key UK milestone. Industry summaries describe the 2018 revision as establishing waterproofing of substrates in wet areas, including domestic showers and bath surrounds, before tiles are installed. Older practice relied much more heavily on grout and tile surfaces to resist moisture.
The practical question isn't “Which tape sticks best?” It's “What layer has failed, and where does the tape belong in the repair?”
The rest of the diagnosis follows from that question. Before buying a product, establish whether you're repairing a visible surface joint, reinforcing a new tanking system or dealing with water that has already reached the building fabric.
What Bathroom Waterproofing Tape Actually Does Inside a Wet-Area System
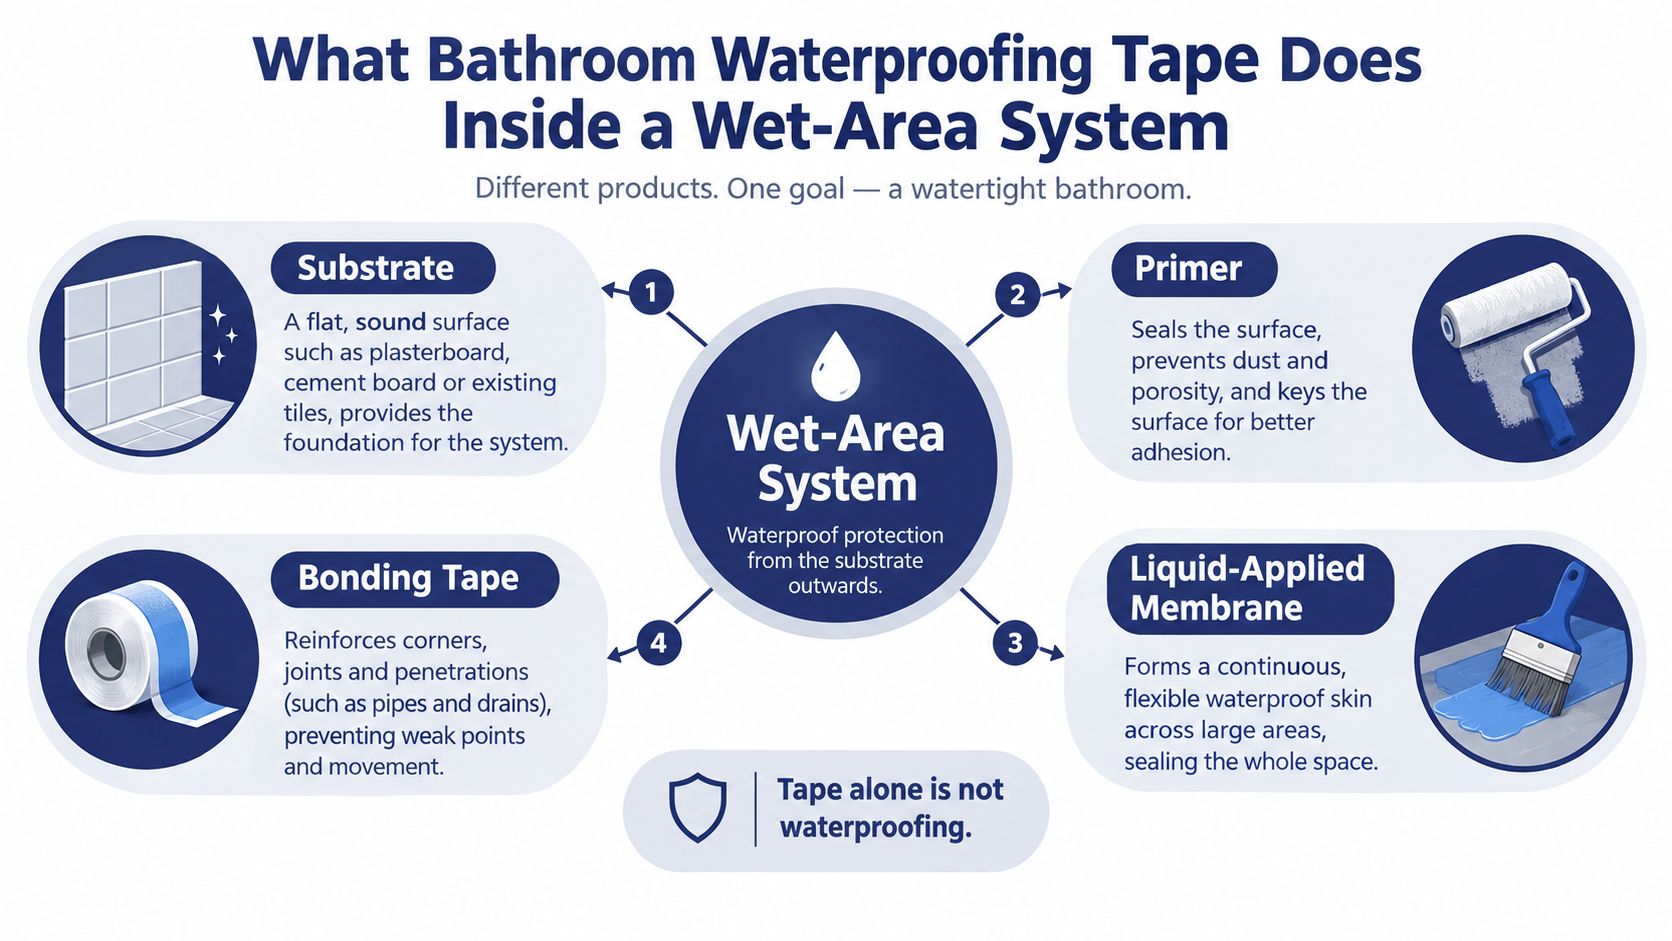
Think of a tiled shower as a sealed envelope beneath the decorative finish. The substrate forms the foundation, the primer prepares its surface, and the membrane creates the continuous waterproof skin. Tile adhesive and tiles sit on top, but they aren't the primary defence against water reaching the wall or floor structure.
Bathroom waterproofing tape reinforces the places where that envelope changes shape. An internal corner, wall-to-floor junction or pipe penetration creates a discontinuity that a flat membrane can't always bridge reliably on its own. The tape is embedded into the membrane or bonding layer, helping the waterproof layer remain continuous while the adjoining surfaces move slightly.
A useful comparison is stitching in a coat seam. The fabric panels form the broad surface, while the stitching strengthens the line where they meet. Stitching doesn't replace the fabric, and tape doesn't replace the membrane. It supports a joint that would otherwise be more vulnerable to movement, folds and gaps.
The layers have separate jobs
- Substrate: A clean, stable board, screed or prepared wall gives the system something sound to bond to. Dust, loose plaster and moisture-damaged board undermine every layer above.
- Primer: The compatible primer controls surface absorption and helps the membrane or adhesive bond consistently.
- Membrane: A liquid-applied coating or sheet membrane protects the broad wall, floor or shower base.
- Reinforcing tape: The tape strengthens corners, joints and penetrations. It must be compatible with the membrane and installed while the bonding layer is workable.
- Tile adhesive and tiles: These provide the finished surface and must be installed over the cured or suitably prepared waterproofing layer.
The Tile Association explains that NHBC requirements cover liquid-applied membranes, flexible sheet systems and watertight boards, with ancillary components such as reinforcement tapes, gaskets, collars and adhesives forming part of the assessed system. Its technical guidance on wet-area systems supports a simple rule: use the manufacturer's tape, or a product explicitly approved for that membrane.
A self-adhesive repair tape placed over existing grout or silicone has a narrower role. It might help with a localised surface repair where the backing is sound, but it doesn't create missing tanking behind a tiled wall. A product brochure can describe adhesion and water resistance, but only an inspection can establish whether the underlying system is intact.
Comparing the Main Types of Waterproofing Tape and When Each One Fits
The tape category should follow the junction, membrane and installation method. A product suited to embedding in a liquid coating isn't automatically suitable for bonding directly over glazed tiles. Mixing products from different manufacturers can also create uncertainty about chemical compatibility, adhesion and system approval.
Waterproofing Tape Types Compared
| Tape Type | Best Used For | Compatible System |
|---|---|---|
| Butyl rubber tape | Board joints, tray edges and selected pipe details | A system specifically approved for butyl components |
| Fleece-backed reinforcement tape | Internal corners, wall-to-floor joints and changes of plane | Liquid-applied membrane or compatible adhesive bed |
| Pre-formed corner pieces | Internal and external angles where a flat strip would fold | The matching sheet or liquid membrane system |
| Self-adhesive repair tape | Localised over-tile sealing on a sound, prepared surface | Repair product instructions, not a replacement for tanking |
Butyl rubber tape is flexible and highly adhesive, which makes it useful around selected board joints and penetrations. Its performance depends on the surface beneath it. Dust, dampness, movement or an incompatible coating can prevent a reliable bond, even when the tape feels sticky during application.
Fleece-backed reinforcement tape is designed to become part of a membrane layer. The fleece gives the liquid coating or adhesive something to grip, while the strip bridges a joint. This is the familiar choice for a new shower tanking installation, especially at internal corners and wall-to-floor transitions.
Pre-formed corners and collars solve shapes that are awkward to make from a flat roll. A corner piece reduces folding and bunching, while a pipe collar creates a more controlled seal around a service penetration. These details are especially valuable where a neat, continuous membrane must pass around a pipe rather than stop at its edge.
Self-adhesive repair tape belongs to a different conversation. It can be appropriate for a limited surface repair when the substrate is dry, stable and demonstrably intact. It shouldn't be used to disguise staining, movement or a failed waterproof layer.
Choose the system first, then choose its tape. Don't choose a roll of tape and try to build a system around it.
Check the technical sheet for the membrane, primer, adhesive bed, substrate and curing conditions. If a contractor proposes a tape from another manufacturer, ask for written confirmation that the complete combination is approved for the intended wet area.
Installing Waterproofing Tape Correctly at Joints and Penetrations
A competent installer treats the tape as part of the membrane installation, not as a final strip placed over a finished wall. The sequence protects adhesion and prevents voids that will disappear beneath tile.
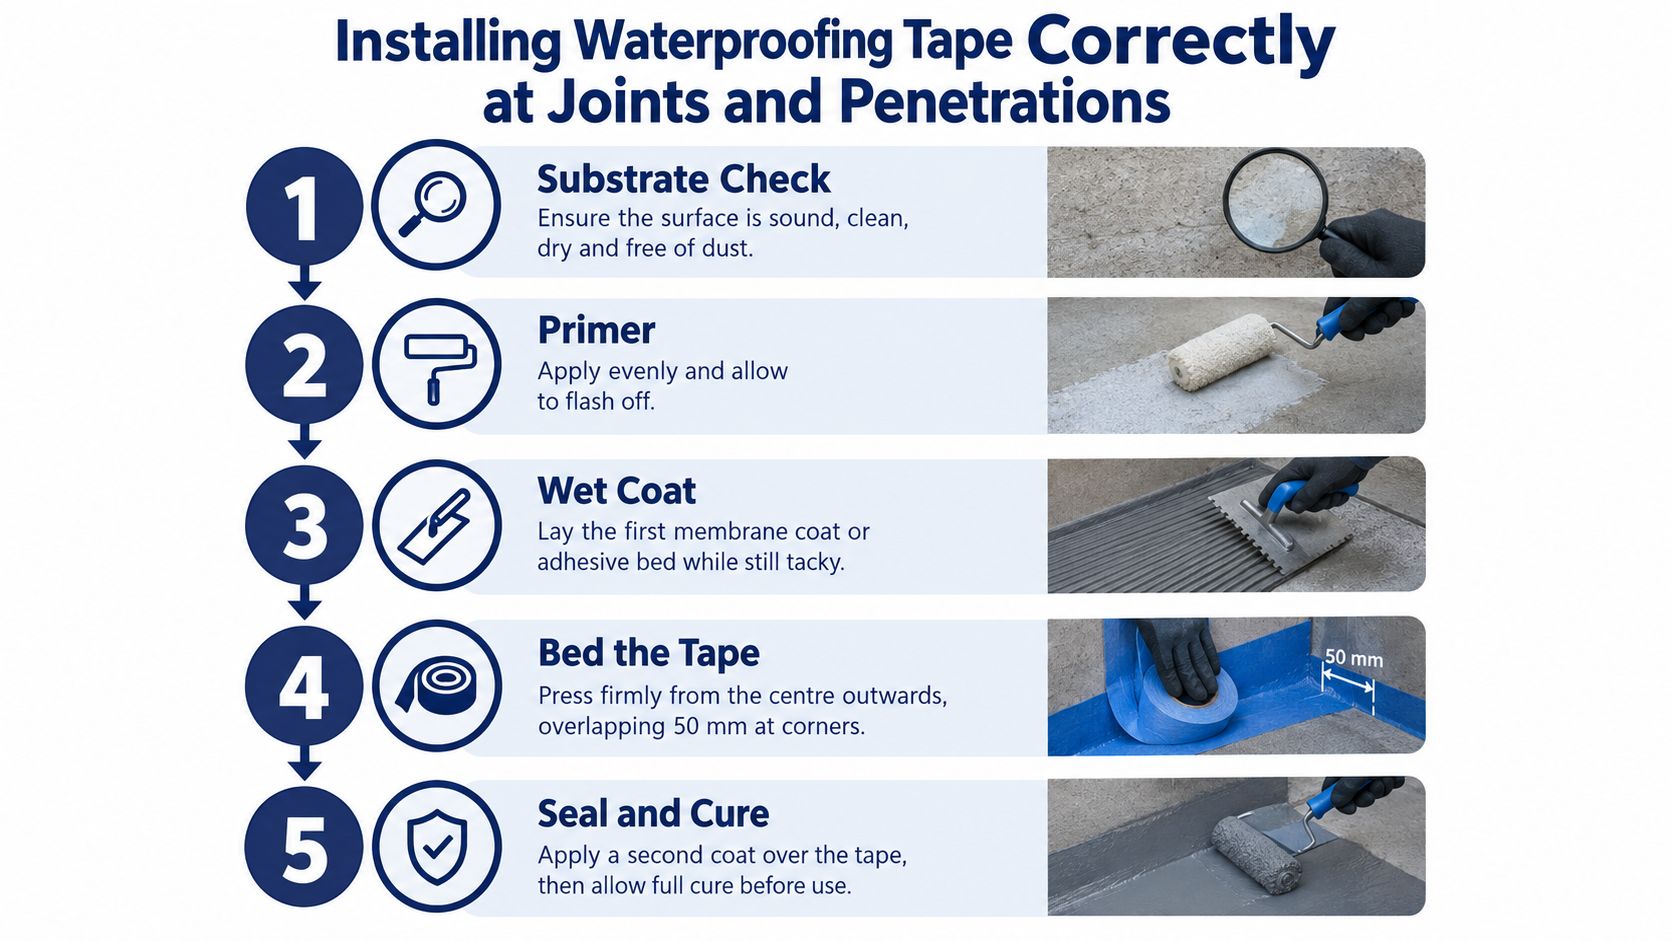
Start with what the tape needs
First, inspect the substrate. It should be sound, clean, dry where the system requires it, and free from dust, grease, loose paint and friable material. Repair movement or damaged boards before applying primer. Tape laid over a weak surface easily transfers the weakness into the waterproofing layer.
Apply the system primer evenly and allow it to reach the condition specified by the manufacturer. A primer that is still unsuitable, contaminated or applied over dust won't provide the consistent key the membrane needs.
Next, apply the first wet coat of liquid membrane, or prepare the adhesive bed for a sheet membrane. While that layer remains workable, place the tape over the joint and press it firmly into position. Work from the centre towards the edges to remove trapped air, folds and dry spots.
Build continuity around the room
At a corner, form the tape neatly without forcing a sharp crease into it. At a junction, maintain the required overlap or use the manufacturer's pre-formed corner. Pipe penetrations need compatible collars or seals, not just a strip cut around the pipe with an open gap.
In a Folkestone bathroom refit, the installer might first tank the prepared shower boards, reinforce each internal corner, detail the wall-to-floor joint and seal the shower controls and waste connections. The second membrane coat then covers the embedded tape and blends the detail into the surrounding waterproof layer.
Before tiling, inspect the work while every detail remains visible:
- Look for dry areas: The tape should be fully embedded, with no pale unbonded sections, bubbles or hollow edges.
- Check corners: A folded strip or unsealed overlap can create a hidden water route.
- Inspect penetrations: Pipes, wastes and fittings need continuous seals around their full circumference.
- Record the system: Photograph the prepared joints, product labels and covered-up work before tile adhesive conceals it.
The UK wet-room guidance on sealing junctions and outlets identifies wall-to-floor joints, wall-to-wall junctions, pipe penetrations and drain outlets as essential locations. It also reinforces the need to waterproof the relevant floor and wall areas rather than treating grout as the water barrier.
When the Tape Is Sound but the Water Still Wins
A well-installed strip can remain intact while the bathroom still suffers water damage. The problem may be drainage geometry, not reinforcement. In a wet room, the floor needs a fall towards the drain so water doesn't sit against joints and outlets. UK wet-room guidance commonly specifies a minimum gradient of 1:80, with 1:60 preferred in some applications, as described by UK wet-room drainage guidance.
A flat or poorly integrated floor leaves standing water where the membrane has its most demanding transitions. One contractor-authored source claims that more than 60% of wet-room leaks arise from inadequate falls or poor drain integration, but it doesn't identify a published survey method or independent national database. Treat that figure cautiously. The practical lesson remains sound: tape can't make water run uphill or repair a waste connection.
Three checks beyond the roll
- Check the fall and ponding. Watch where water travels after a shower or controlled test. Persistent pooling near a tray edge, corner or waste deserves attention before any surface repair.
- Check the structure and junctions. Look for movement, cracked grout, a detached sealant bead, a failed tray flange or a drain outlet that wasn't integrated into the membrane.
- Check moisture removal. A wet surface that stays wet because of poor extraction can degrade sealants and finishes even when the concealed tanking is sound.
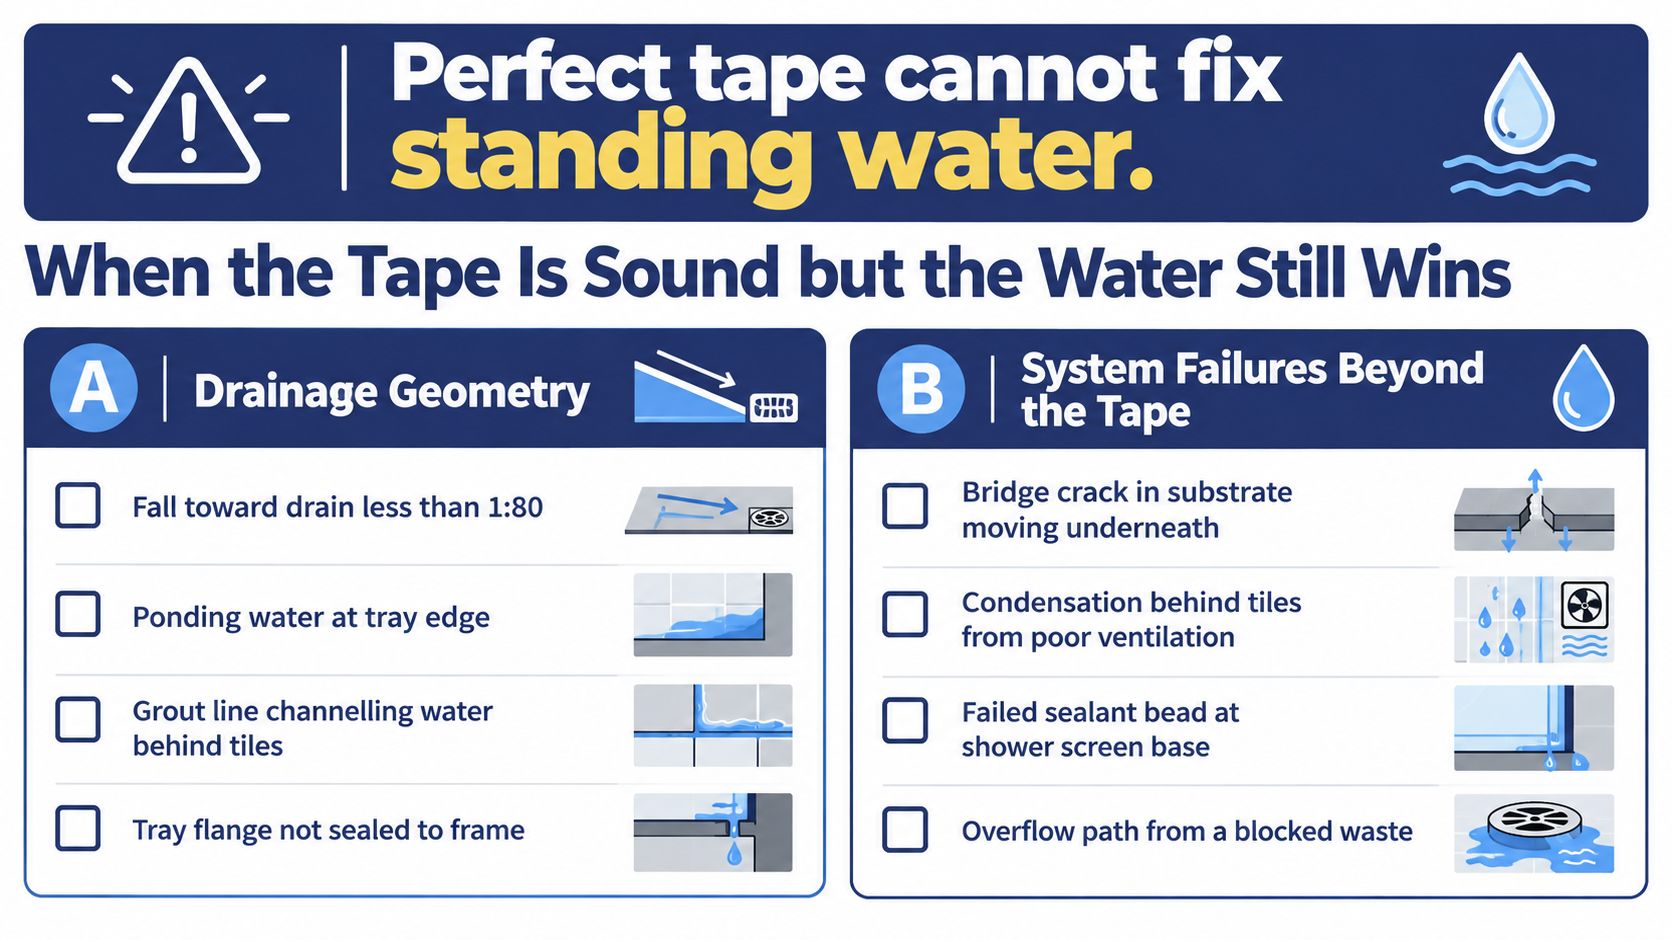
Consider a rental property between tenancies. The fan runs noisily but moves little air, and the shower screen base has a split sealant bead. Or consider a family bathroom with accessibility adaptations, where a mobility shower may run for longer and the window may stay closed for comfort. In both cases, a stronger tape won't address the complete moisture load.
A tape repair is therefore necessary only when it belongs to the identified failure. If the room has standing water, movement or unresolved humidity, repair the cause as well as the visible joint.
Diagnosing Whether You Need Tape or a Full Wet-Area Rebuild
Start with observation, not demolition. A stain below the shower proves that water has travelled somewhere, but it doesn't reveal whether the membrane is missing, the silicone has failed or the substrate is already saturated.
Follow the clues in order
Tap accessible tiles lightly and listen for hollow areas. Check whether silicone has detached from the bath, tray, screen or wall. Look for staining at the base of the wet area, swollen skirting, soft plasterboard, musty odours and cracks that reopen after resealing.
Where access allows, inspect the adjacent cupboard, ceiling void or service panel. A moisture meter can support the assessment, but it shouldn't replace an investigation of the plumbing, drain and waterproofing details. The key question is whether the backing remains sound and whether water has reached the building fabric.
| Finding | Likely response | Main risk |
|---|---|---|
| Localised failed sealant, sound backing and no evidence of migration | Remove, prepare and reseal the joint | Treating a membrane failure as a cosmetic defect |
| Cracked grout or damaged tile with apparently sound tanking | Replace the affected finish and restore compatible seals | Leaving movement or a penetrated membrane unresolved |
| Staining, musty backing, swollen board or recurring damp beyond the joint | Open up the area and assess for a partial or full rebuild | Repeating surface patches while hidden damage spreads |
A localised reseal makes sense when the substrate is dry and stable, the membrane is believed to be continuous and the failure is confined to the visible seal. Remove failed silicone fully, clean the joint, allow it to dry and use a sanitary sealant suited to the materials.
A partial strip-out is more appropriate when the finish has failed around a limited area but the surrounding tanking remains demonstrably intact. The installer can remove affected tiles and board, inspect the membrane, repair the detail and reinstate the finish.
A full rebuild becomes the responsible option when moisture has migrated behind tiles, the boards are saturated, the floor or tray detail is defective, or movement continues. Applying tape over a leaking shower joint without identifying the source may offer a temporary patch, but it can't replace missing tanking or dry damaged structure.
A contractor's recommendation should connect the visible symptom to a specific failure mechanism. Ask what was inspected, what will be opened, and how the proposed repair proves the membrane is still continuous.
Ventilation and Moisture Control as the Hidden Half of the System
Waterproofing controls liquid water at the wet-area boundary. Ventilation controls the moisture that escapes into the room during every shower. A bathroom can have sound tanking and still develop mould, peeling sealant or damp-looking finishes if humid air remains trapped around the walls and ceiling.
UK government guidance on damp and mould identifies bathrooms as high-moisture rooms requiring adequate ventilation. It also recommends regular inspection and maintenance of extract systems. Local-authority damp and mould policy places similar emphasis on using and maintaining bathroom extraction.
An extractor may run without extracting effectively. The external discharge could be obstructed, the ducting could be poorly arranged, the fan could be dirty or the overrun may not operate. A window that stays shut in winter can add to the problem, particularly where the bathroom has no effective mechanical alternative.
A practical moisture checklist
- Test the fan: Listen for unusual noise and confirm that it starts reliably.
- Check the discharge: Make sure air reaches the outside and that the grille isn't blocked.
- Review controls: Confirm that the overrun or humidity control operates as intended.
- Use available ventilation: Open the window when practical and keep trickle vents clear.
- Inspect finishes: Watch for returning mould, peeling paint, soft sealant and staining.
- Check after repairs: If the problem returns, reassess humidity as well as the joint.
The same principle applies in different properties. A landlord may inherit a tired fan in a buy-to-let. An older resident may use a mobility shower for longer, while a family bathroom converted from a separate WC may have limited natural ventilation. None of those conditions automatically indicate a failed tape installation.
If mould returns after a repair, don't assume the new strip needs replacing first. The better question is whether the room is removing moisture effectively and whether the visible deterioration sits inside or outside the concealed wet-area boundary.
Planning a Tape-Conscious Bathroom Renovation in Folkestone
A reliable renovation quote should describe the wet-area system, not merely promise that the shower will be “waterproofed”. Ask the contractor which membrane or board system they intend to use, which tape and collars belong with it, and who will inspect continuity before the first tile is fixed.
The specification should identify the substrate preparation, primer, membrane, reinforcement, drain and pipe details. It should also explain how the floor fall will direct water to the waste and how the extractor will remove room moisture. Those details show whether the proposal treats the bathroom as one connected system.
Keep useful evidence before the tiles go on
Request photographs of the prepared substrate, primed surfaces, embedded tape, collars, corners and drain connection. Record product names, batch information and the relevant system approval or assessment reference where available. The Tile Association notes that, for power showers and wet rooms, the complete waterproofing system needs to be listed in the relevant assessment table or separately assessed by NHBC.
After handover, protect the work with simple habits. Use the extractor during showers and afterwards, keep the outlet clear, inspect grout and silicone for early movement, and deal with small failures before water reaches the backing. A surface sealant isn't the membrane, but it still helps control where water travels across the finished junction.
For a Folkestone renovation, using a coordinated local bathroom renovation service can reduce the handoffs between design, plumbing, tiling, electrical work and decorating. The important point is accountability. One project team should be able to explain how the substrate, tanking, tape, drainage and ventilation work together, rather than leaving each trade to defend only its own part.
The short action list is:
- Specify the system: Name the membrane, tape, collars and substrate.
- Verify before tiling: Inspect and photograph every joint, corner, penetration and drain detail.
- Check the room: Confirm falls, drainage, extraction and access for future maintenance.
- Diagnose before patching: Choose resealing, partial opening or rebuilding based on evidence.
- Maintain the finish: Monitor silicone, grout, fan operation and early moisture signs.
Seby Bathroom Renovation provides Folkestone homeowners and landlords with coordinated bathroom design, plumbing, tiling, electrical work, decorating, repairs and accessibility improvements. If you're planning a wet-area renovation or facing a recurring leak, visit Seby Bathroom Renovation to discuss the waterproofing system, diagnosis and installation work your bathroom needs.
Created with the Outrank tool